
A Simple Yellow DOT Anywhere
You can have a standard IMVU STANDING SPOT, pretty much any place you want
Most rooms come with very few standing spots. This is dont so you can add
furniture where you want to AND make NEW standing spots
Where YOU want them
Add a DOT ~ Add a SPOT
Place it on the Bridge over the lake, Place it next to your Throne
Place them as greeting spots in that special spot close to the door
Ever have someone come into your Public Room and immediately hop in to a BAD place?
A lot of people are under the impression they NEED to Hop and Spot coming in to a room
This is the fix. Go to the regular Landing spot of the room and look out in front of you
Give them a NEW more Tempting close spot to Hop to... FIXED!
(: Thousands of Uses :)
Use this in ALL of your rooms
Like to PLAY and have FUN ? ? LoL
Place a couple behind the couch and RESIZE them to a HUGE size. . .
Jump on it... and see the 50 Foot tall avatar!
Place one or two on the ceiling that are UPSIDE DOWN!!! :D
Have tons of fun, that is what we are all doing here
:D Enjoy
See the Whole Series of
ADD A YELLOW DOTs
Standing, Sitting, Upside Down, Vampire Slumber pose - More
FURNITURE HINTS AND HELP BELOW
![]() first in the Client Shop Window
first in the Client Shop Window
Many more choices are available.
More Choices HERE :
(: FURNITURE TOOLS HELP 101 :)
Helpful Hints and Instructions
[How the HECK Do I Find My Characters I Bought]
Well, IMVU made a little thing called Inventory Search in your Inventory. Look under Furniture and type in
' Yellow Dot ' in the little block there that says Search. Just like magic only the Characters are showing in your inventory
You can use this for any Inventory Item you just have to figure out the catch words.
[GRAB THE HAMMER IN YOUR ROOM]
While you use the 'Furniture Tools' in your room, use the "MOVE" tool to get the Characters as close to the area as you can. This is easier to do if you are standing close as you can to the placement. In some rooms you may have to "Drag" the piece because there are not enough furniture nodes made into the room. Yes you can still get it there. Use the Birdseye View if you get one on top of the other.
[FINE TUNE THE PLACEMENT]
Once you have a character close to where you want it. Use the MOVE tool again but before you
click it hold the SHIFT Key down. It will let you fine tune the alignment to Left and Right. Play with it...
Similarly, use the CTRL Key and this will let you fine move the piece up and down. Use the regular
ground view and birdseye views. If the characters are to be placed on a Wall as a Sign, I suggest you
line them up on the floor below where you want them. Get the spacing set and then 'List' them with the
Shift+Move Tool. Get them all about the same height, then turn your camera to a side view and then use
the Ctrl=Move tool to sink them toward the wall.
[SCALE IT TO SIZE]
Not BIG enough? While still lined up on the floor, use the "SCALE" tool to Resize the pieces. Place them all
on the floor in the basic position you will have them in and scale them to size with the Furniture Scale too.
Get the spacing right on the floor then elevate them.It is so much easier. Don't scale them to big though.
Nothing over 3 times as big as a rule. It seems to lag the room sometimes. Experiment. Once you have
the piece to a good size.
[ROTATE, SPIN, TILT and TURN]
These being a Furniture FLOOR Item can easily be rotated and tilts. The Characters that are WALL objects will
do weird things. Play with the tilt and turn features of your furniture tools.Once in a while, you *may* need
to Rotate or even TILT a piece to align with a slated wall that doesn't want to cooperate. You can make the
things into ARCs and CURVES. It takes PRACTICE but Use the "ROTATE" tool by itself or try it with a
combination of the Shift Key or the CTRL Keys. Play with it. You will get different effects in different rooms.
If it gets really messed up while you are trying, don't get "FUSStrated" just Trash Can it and grab another
and start again.
[REMOVING OLD OBJECTS]
Have you got like a bunch of objects in the room that you are replacing or wanting out of there? Hitting the Trash Can
with 40 pieces can be a drag. Here is a slick trick for you. Go to the catalog page where you purchased the item. An easy
way is to Right Click in the room you are in and Click on Products in the scene. Go to the new page that opens and
double click the product. Look down toward the bottom of the catalog listing for a Big RED number. This is the
product ID Number. Close that window and go back to your room. Use the command *REMOVE NNNNNNN Where
the NNNNNNN is the Big Red number you just found. :D POOF-ALL OF THEM ARE GONE. Like I said, it is for removing
a bunch of one item number. You can remove all the Add A Yellow DOTS at the same time by using the *REMOVE 7953185
Now that you know this, don't get your girlfriend to say *REMOVE xxxxxxx and the number of her dress either, ok? LOL
[TROUBLES ?]
Sometimes when moving a piece in a "tight" area, it may all of a sudden JUMP away and go way over there.
Trash Can it if it is way off and start and new one. This is caused by usually 1 of 2 things. Either you are trying to move
a furniture 'through' a bunch of animated object areas OR the Room manufacture has not put enough furniture nodes
in the room when it was originally created. BUT move the Camera around to a little different position and try again.
Depending on how many animated objects or the line of sight for the camera, your piece may continually jump out
and run away. that is a sign of bad room design :( try it in a different room.
[Patience along with a trial and error] in a session will bring a lot of great rewards. You will find out that you *CAN*
change your rooms and make them as warm, friendly and pro looking as you want them. YOU have the control
with a little learning and some practice :D It is supposed to be FUN so when frazzled, walk away and take a break
Come back later when you have had a minute to regain your strengths and determinations. Perseverance!!! :D
[ I have a question for YOU! ]
WHO else took time to tell you all these things? Support my products, if you please. A-N-D
Yes it is ok to Bookmark to Favorites this page to refer back. Send your buddies here
when they need furniture help. I am HERE, just send me a Private Message
Heck I have people come to this page to get help and they didn't even buy my products
After I help them, guess what, they buy my products! LOL
Creator's Notes
&
UV Maps Below

|
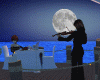
Weddings Music Ambiance |
Candlelight Dinner for Two |
Wedding Priest & Vows |
|||
 |
 |
 |
More Wedding Items
Creator's Notes & Tips:
Graphics!!!
I have used small sized graphics for the excellently LOW Kb to help reduce overall client crashing.
This also leaves you plenty of Kb Room to add your wonderful artwork and still have a light weight product.
Please note, if your color combinations are not working, adjust the Vertex On or Off as needed.
You can also adjust the "Self Illumination". Experimetn with these settings.
You may use any size graphic you wish. If you need more detail use a Larger Graphic 256x256 or 512x256, etc. This
project may use Mapped (below) and / or Standard graphics in a 128x128 (low Res/Kb), 256x256 (normal Res/Kb) and up to 512x512 (High Res/Kb) Look closely at my "starter" textures in the Create Mode to get an idea of their layout, sizes, more... Experiment!
Most all textures are 'standard' (as in the preview pane of Create Mode except for any UV Mapped as in the below) Change as many textures as you want. I suggest you make yours unique!
Can you use my textures on my products? YES!
Can you use my textures on other products? No.
Sample Texture Material Opacity -
Please, keep in mind, your graphics dimensions can be larger or smaller than mine.
Confused? Just drop me a PM and I will respond as soon as possible.
You may also find handy the " Creator's Helping Hands" It makes the avatar Stand Still for photos, etc.
ENJOY
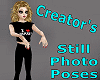
Make Avatars Stand Still
Note: Graphics are Granted Use License for *this* project only. As always, if you have questions or need help, I am here.
Presenting the
Storybook Theater

presented by
Goldilocks & Lestat