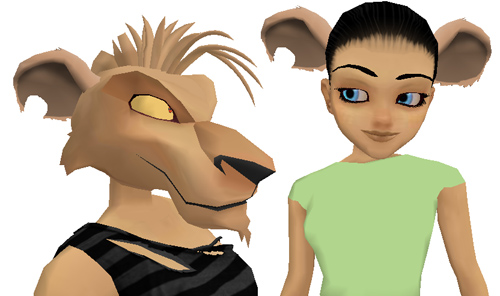
(This item can be used with both Male and Female avatars)

Wish these Ears were Black? Yellow? Purple with Pink Polka Dot?? Well then, buddy, start Deriving! Make your own version, and even sell it the catalog for a small markup over my original, and keep the extra profits for yourself! You can express yourself AND earn credits at the same time. How's that for a sweet deal? You'll need a full account on IMVU, as well as a copy of Previewer. You can find out more about Deriving on the IMVU's Education Center. Below is the template you'll need to get started (Right Click and Save As to your computer):
This is the actual Texture map used on the Left Inner Ear. Use this to make small changes, like color or shade:

This is the Opacity layer for the Left Inner Ear. An Opacity image is like a Black and White silhouette, which tells the computer which parts of the image should be visible, and which should not. Basically, the darker the image becomes, the less of the model is visible. This image MUST match the shape of your new Texture! You can use gray to make things glass-like, but due to errors in IMVU's handing of transparency, you might see other strange graphic glitches. It's best to stick to solid white and black:

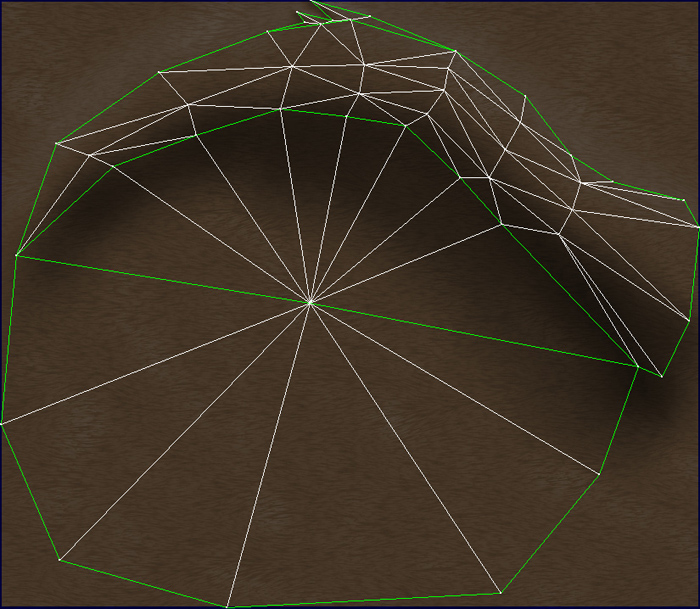
This is the Wireframe Template for the both the Inner and Outer Left ears. This shows you exactly how the Texture map adheres to the structure of the model. You'll need this if you want to create a completely new Texture map. This template is used for both Right and Left ears, it's just mirrored on the other Left:
This is the Texture map for the Left Outer Ear. This image is mirrored, so whatever you use on it is backwards. Keep that in mind if you plan on using text or numbers on the back of the ear:

The Outer Ear uses the same Opacity image as the Inner Ear, allowing holes cut in the front to be easily mirrored in the back. It also uses the same Wireframe template.
This is the Texture map for the Right Inner Ear:

This is the Opacity layer for the Right Inner and Outer Ear:

This is the Texture map for the Right Outer Ear:

To add sound, I highly recommend you download and use Audacity. It's a free sound editing tool that can export out OGG sound files. OGG sound files compress down to less then 1/10th the file size of WAV files. SO USE OGG FILES!!! You can download it here:
http://audacity.sourceforge.net/
Also avoid looping sounds, as they tend to get annoying to listen to very quickly. Try to keep your volume levels low as well, as IMVU tends to over-amplify all audio playback to near ear-bleeding levels.