If you've ever seen the IMVU Creator Twitch channel, you know MooBot (also known as the Moderation Bot), and how terribly oppressive and annoying it is. Well now it's a PET! Get cute and murderous with your very own adorable chat oppressor. It includes NUMEROUS attack animations, which you can use to attack perfectly acceptable conversations with NO JUSTIFICATION AT ALL! Kick people for using too many caps, punctuation, talking too much, talking too little, or if their name just happens to be "MaxSMoke777". At least this Moobot is cute. :p
Commands are:
"Cannon"- Moobot produces a cannon from it's mouth and blasts Max for talking
"LaserEyes"- Moobot shoots lasers from it's eyes and blasts Max for talking
"Missiles"- Moobot fires missiles at Max with great hate and malice
"Yes"- Moobot agrees to kick Max for NO REASON
"No"- Moobot will not let Max on for 10 solid minutes
"Patrol"- Moobot searches for Max to ban him
"Radar"- Moobot scans for any and all Max activity it can abuse
"Shades"- Moobot puts on shades because it thinks it's SO COOL for banning Max again
"RemoveShades"- Puts away the glasses so it can see and harass Max better
"Yay"- Moobot celebrates, yet AGAIN, banning Max
PLEASE NOTE: The MooBot is for Male *and* Female avies. It attaches to the "Root" Node of the avie's skeleton. There's a limit to the number of things you can attach to any Node, so it might conflict with other items which attach to same node, like Pets. For instance you add too many pets, this item might vanish, or cause one of your other items to disappear. As always, to ensure your full satisfaction with this product, please use TRY IT before you BUY IT! There will be NO REFUNDS if it doesn't fit your needs.
Wish Moobot was chrome? Golden? COVERED IN THE BLOOD OF MAX?! Well then, get to work and DERIVE it! Make your own version, and even sell it the catalog for a small markup over my original, and keep the extra profits for yourself! You can express yourself AND earn credits at the same time. How's that for a sweet deal? You'll need a full account on IMVU, as well as a copy of Previewer. You can find out more about Deriving on the IMVU's Education Center. Here are the templates you'll need below:
Please note that the model is mirrored to save on texture map usage. Whatever is written on one side will be mirrored, and possibly backwards, on the other. For that reason, it's best to avoid text and numbers in your new skin.
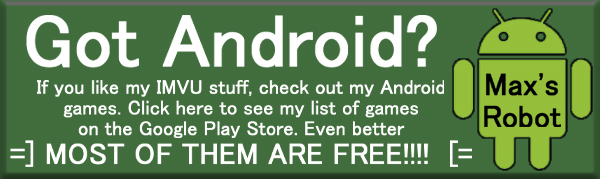
This is the actual Texture map used for the Body. Use this to make simple changes, like Color:
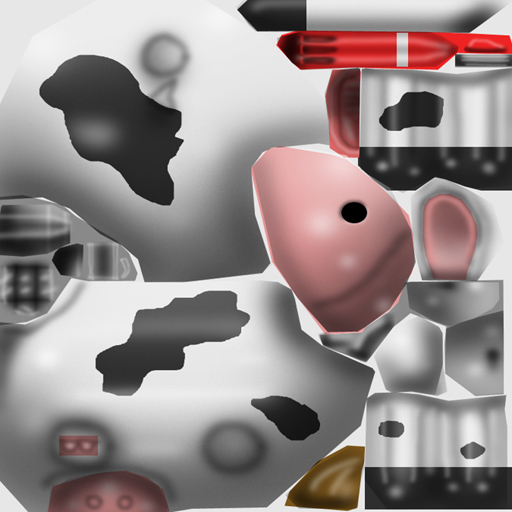
This is a "Grey" template for the Body. This is useful if you want to make a completely new skin, but still want to retain all of my careful shading and highlights. Use this with the Wireframe template below to allow easly create perfectly shaded with ease:
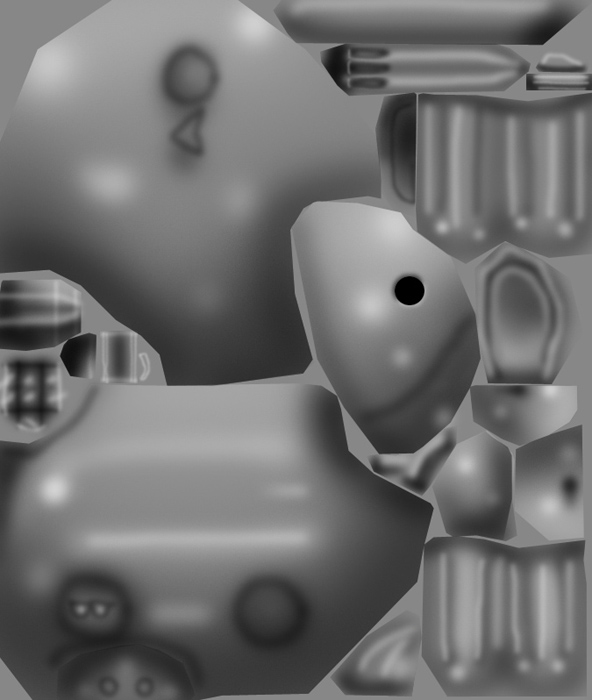
This is the Wireframe for the Body. This shows you exactly how the Texture map adheres to the structure of the model. You'll need this if you want to create a completely new Texture from scratch:
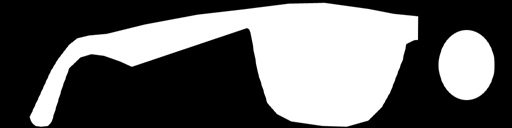
This is the Texture map for the Eye Bits. This includes the Moobot's eyes, as well as the sunglasses it can wear on command:

This is the Opacity layer for the Eye Bits. An Opacity image is like a Black and White silhouette, which tells the computer which parts of the image should be visible, and which should not. Basically, the darker the image becomes, the less of the model is visible. You can use gray to make things glass-like, but due to errors in IMVU's handing of transparency, you might see other strange graphic glitches. It's best to stick to solid white and black:
This is the Wireframe for the Eye Bits:

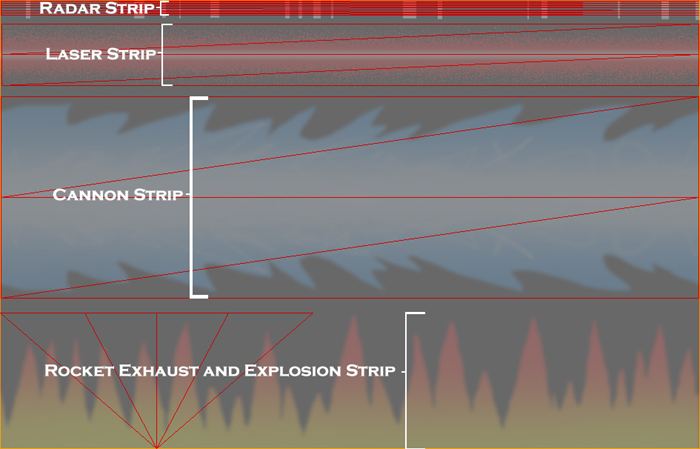
This is the Additive texture for the Glowing Parts. An Additive texture is an image that is glowing. It is brighter, and more solid, the lighter each pixel is. The darker each pixel becomes, the more transparent, ending in completely invisible when completely black. You can not, for instance, have a Black Rain using an Additive texture, as it would become invisible. To make something like Black Rain, you'd have to create a matching Opacity layer for your new Black Rain Effect texture and change the Blending Mode to Composite:
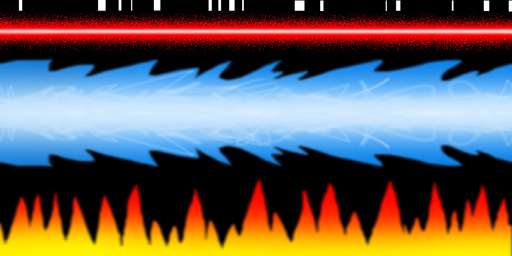
This is the Wireframe for the Glowing Parts. Here you can see how the Glow Parts use a single image to make 4 different animated effects. When editing this image, make ABSOLUTELY CERTAIN that both the Left and Right of the image match, or else a seam-line will appear as your effect moves. You can edit the speed and motion of the Glowing Parts by changing the settings under the Mesh Tab in the Editor under "Texture Animation":
One easy way to add value to your derive is to add sound, as the item has none of it's own. To add sound, I highly recommend you download and use Audacity. It's a free sound editing tool that can export out OGG sound files. OGG sound files compress down to less then 1/10th the file size of WAV files. SO USE OGG FILES!!! You can download it here:
http://audacity.sourceforge.net/
Please keep your sound volume levels within acceptable limits. DON'T MAKE YOUR SOUND AS LOUD AS POSSIBLE!!! Loud sounds will annoy other users, and reduce your sales. Also avoid using Looping sounds, as IMVU has no controls to stop Looping sounds once they start playing.