I've made this item ridiculous to demonstrate to Derivers just how flexible the Little Dude can be. He has maskable parts for Wings, Horns, Hats, Halos, and Tail. You can shape, or even remove, any or all of these things with a little 2D photo editing and the templates below. DON'T COPY MY DESIGN! MAKE ONE OF YOUR OWN! This little guy is wide open to changes, so CHANGE HIM! Here's some suggestions:
Dragon Man
Angel
Devil
Robot
Mutant
Purple People Eater
Gray Alien
Skeleton
Cupid
Commands are:
"Yes" - For a nod
"No" - For a head-shake
"LoL" - To laugh
"Secret" - To whisper something into your ear...
"DefendMe" - To defend your honor!
"Itch" - If he's itchy
"Yay" - To celebrate
"SlapMe" - To slap some sense into you!
PLEASE NOTE: The Little Dude attach to the "rtClavicle" Node (Right Shoulder) of the avie's skeleton. There's a limit to the number of things you can attach to any Node, so it might conflict with other items which attach to the other root node, like Pets. If you add too many items to your "Root" node, the Little Dude might vanish, or cause one of your other items to disappear. As always, to ensure your full satisfaction with this product, please use TRY IT before you BUY IT! There will be NO REFUNDS if it doesn't fit your needs.
Are you ready to express yourself?! Well then, get to work and DERIVE it! Make your own version, and even sell it the catalog for a small markup over my original, and keep the extra profits for yourself! You can express yourself AND earn credits at the same time. How's that for a sweet deal? You'll need a full account on IMVU, as well as a copy of Previewer. You can find out more about Deriving on the IMVU's Education Center. Here are the templates you'll need below:
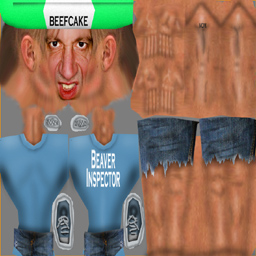
This is the Texture map used for Body. You can use this to make simple changes, like altering their overall color, adding special markings, or deleting the words off his stupid shirt. You SHOULD be making your own skin for him and not copying mine though:
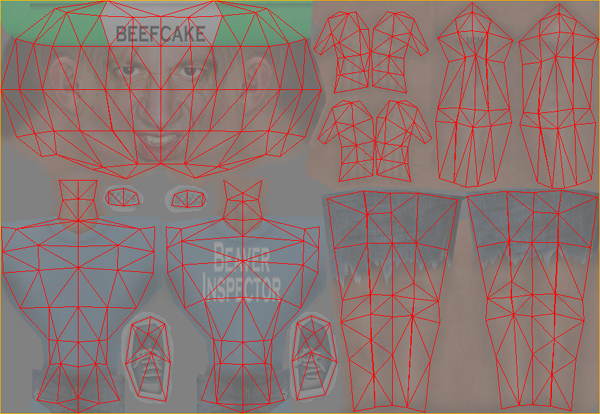
This is the Wireframe Template for Body. This shows you exactly how the Texture map lays over the model. You'll need in order to make a new Texture map from scratch... which you SHOULD DO:
This is a "Gray" Template. The purpose of this template is to retain all of my careful shading so you can more quickly make your own new Texture. Apply this image to your new Texture has a lighting layer, but use the face to help you guide the placement of your own facial image:

This is the Texture map for 2D Parts. This includes the Halo, Wings, Horns, Hat, and Tail Parts. Observe the placement of the elements before starting on your own design. Start from Left to Right, on the top row you see the Halo layer, the Hat layer, the Front Horns, and the Side Horns. Both sets of Horns are rotated 90 degrees counter clockwise. You'll notice faint lines on the right side of the horns showing the curve of the Head they attach to. The Hat attaches to the 3rd row of vertexes from the top of the Head texture, as shown on the Body Wireframe. You could use the Horns layer to enhance a Hat design, such as filling in the body of a Top Hat, or add Antenni. The Horns layer could also be used for more dramatic hair, like a Mohawk. Below that you'll see the Tail devided into Side and Top sections. These cross, forming a "+". And the large rectangle below that is the Wings. You can make the Wings as full or narrow as you wish, but pay attention to the connecting point at the bottom of the image, which links the wings to the back. If you increase the size of this part, it won't fully connect to the Little Dude's back:

This is the Opacity layer for the 2D Parts. An Opacity image is like a Black and White silhouette, which tells the computer which parts of the image should be visible, and which should not. Basically, the darker the image becomes, the less of the model is visible. You can use gray to make things glass-like, but due to errors in IMVU's handing of transparency, you might see other strange graphic glitches. It's best to stick to solid white and black:

This is the Wireframe template for 2D Parts:

To add sound, I highly recommend you download and use Audacity. It's a free sound editing tool that can export out OGG sound files. OGG sound files compress down to less then 1/10th the file size of WAV files. SO USE OGG FILES!!! You can download it here:
http://audacity.sourceforge.net/
Please DON'T MAKE YOUR SOUND AS LOUD AS POSSIBLE!!! Loud sounds will annoy other users, and reduce your sales. Also avoid using Looping sounds, as IMVU has no controls to stop Looping sounds once they start playing.