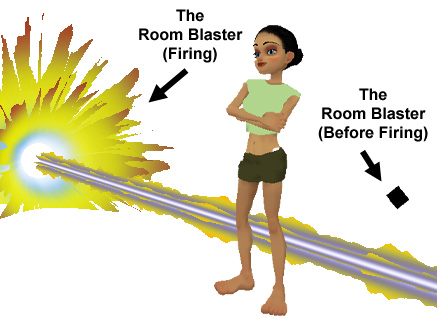
Wish those cannons on your ship could actually shoot? Want that dragon statue to breath fire? Don't bother hunting down the original modeler and begging him/her for an upgrade. Add a "Blast" of fun to anything in your chatroom with the Room Blaster. Just slip this small black pyramid into your boring old items and instantly turn that static object into a weapon that could level a city! Hide it inside a Dragon statue, a ship's wing, or a picture of your Mother! Or for extra fun, add a few copies around the edge of a dance stage for a really rad light show. And since it's derivable, you can make different versions with different commands. You'll have your own laser light-show in no time!
Commands:
"RoomBlasterFire1" - To fire off the cannon effect
Like all Furniture items, you can use the Furniture Controls to copy, move, and rotate the Paper Lantern around your room. You can copy them as many times you as like from this single purchase. You can also resize them, if you want tiny or massive objects.
Not fond of the color? Don't like one of those effects? Wish it fired Faster/Slower? And how about some sound effects?? Well then, buddy, start Deriving! Make your own version, and even sell it the catalog for a small markup over my original, and keep the extra profits for yourself! You can express yourself AND earn credits at the same time. How's that for a sweet deal? You'll need a full account on IMVU, as well as a copy of Previewer. You can find out more about Deriving on the IMVU's Education Center. Below is the template you'll need to get started (Right Click and Save As to your computer):
Please note that this model uses *ALOT* of scrolling animation. You can adjust the speed of the image under the Material settings, as well as the direction it flows on the model. Please experiment with these settings, as the speed and direction settings I used might not work perfectly for you. Also there's new and completely different effects you can gain by modifying these numbers.
This is the Texture map used Pyramid itself. You most likely won't need to alter this image, as the pyramid should always be hidden. You could add a marking to the front though if aiming is an issue:

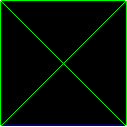
This is the Wireframe template for the Pyramid. This shows you exactly how the Texture map attaches to the model. This is flat mapped, so whatever is on the front will appear on the back as well. Again, it's unlikely you'll want or need to alter this image, as the Pyramid should be hidden inside of something else:
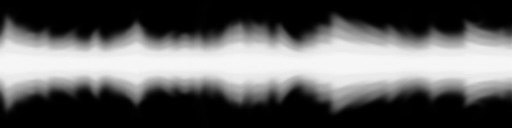
This is the Texture map for the Energy Shell. The Energy Shell is the spherical thing you see collapsing repeatedly during the charging portion of the firing sequence:

This is the Opacity layer for the Energy Shell. An Opacity layer is like a black and white silhouette that controls how much of the model is visible. The more white, the more solidly visible it becomes. The more black, the more invisible. You can use this to make the Shell more visible, by making it brighter, or remove it entirely by making it solid black. Whatever you do though, make certain the Opacity layer image matches the same dimensions and layout of it's matching Texture map, or graphical errors will occur:

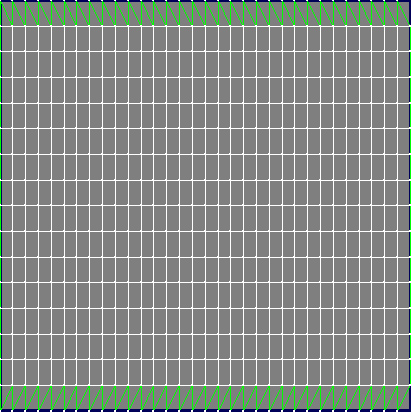
This is the Wireframe for the Energy Shell. This might be helpful if you wish to cut some holes in the Shell, as this will guide your efforts. The triangular bits at the top and bottom are where the sphere closes. The sphere is on it's side, so those correspond to the front and back of the sphere:
![]()
There is a Texture map for the White Bubble, but I haven't included it here because it's solid white, and would be invisible on this white page. The White Bubble is the ball of energy at the center of the blast, seen before and after the Blaster is fired. You could make this into a flaming, or a ball of lightning, but if you wish to define it's shape as something other then a solid sphere, you'll need to make a matching Opacity layer as well.
This is the Wireframe for the White Bubble:
This is the Texture map for the Muzzle Flash. This Muzzle Flash is the firy effect that appears around the White Bubble, after the Blaster has completed charging and is fired:

This is the Opacity layer for the Muzzle Flash:

This is the Wireframe for the Muzzle Flash:

This is the Texture map for the Energy Beam. The Beam's Texture is tiled dozens of times across the vast length of the beam, so whatever changes you make here will be see MANY times when the Blaster is fired:

This is the Opacity layer for the Energy Beam:
This is the Wireframe template for the Energy Beam. Here you can see just how many times the Beam's Texture map is repeated on the model (that tiny dark blue square in the middle is just one of the tiles):

There is a Texture map for the Sparkle effect, but it's not included here as it too is solid white. The Sparkle effect seen when the Blaster is charging, and appears like little bits of energy getting sucked into the charging power ball. You can alter this image if you want those Sparkles to be blue, or red, or some other solid color. But if you wish to change the SHAPE of the Sparkles, you'll need to alter the Opacity layer as well.
This is the Opacity layer for the Sparkle effect:

This is the Wireframe for the Sparkle effect. As you can see, the model doesn't quite take up all of the image, but all of the image becomes visible as it scrolls across the model:

To add sound, I highly recommend you download and use Audacity. It's a free sound editing tool that can export out OGG sound files. OGG sound files compress down to less then 1/10th the file size of WAV files. SO USE OGG FILES!!! You can download it here:
http://audacity.sourceforge.net/