How does a Viking God drive his point home? With a Big FREAK'N HAMMER! Make the kind of impression that's hard to ignore with your very own Mjollnir, aka Thor's Hammer. This brutal combination of divine power and unbreakable design will make any frost giants quake in their boots and send those dire wolves packing. Command lightning and splits the ground like glass with a mighty swing. About the only thing it won't do is actually effect another IMVU avatar. Even the Powers of Gods have their limits...
Commands:
"HammerBlast" - Fires off a bold of Lightning
"HammerGlow" - Warns foes that your hammer is no Toy
"HammerHold" - Gives you a better grip on your weapon
"HammerPound" - Splits the Earth like Glass
"HammerThrow" - Hurdles the Hammer at your foes, to strike and returns it
PLEASE NOTE: The Thor's Hammer works equally well for Male and Female avies, but is found under Male Gloves. Blame IMVU's poor catalog system for that one. This item also conflicts with any item that uses Channel 97 in the avie's body. Extremely few items replace that body channel, but if one of your items does it will either remove this item, or the other item. It might not properly fit certain items like Hand Replacements and Custom Avatar Bodies. To ensure your satisfaction with this product, please use TRY IT before you BUY IT! There will be NO REFUNDS if it doesn't fit your needs.
Prefer a Gold Hammer over Silver? Wish to blast people with Fire instead of Lightning? And how about some SOUND EFFECTS??! Well then quit complaining and DERIVE it! Make your own version, and even sell it the catalog for a small markup over my original, and keep the extra profits for yourself! You can express yourself AND earn credits at the same time. How's that for a sweet deal? You'll need a full account on IMVU, as well as a copy of Previewer. You can find out more about Deriving on the IMVU's Education Center. Here are the templates you'll need below:
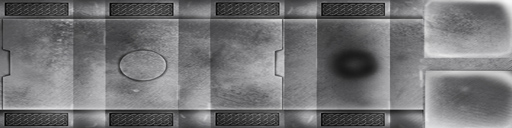
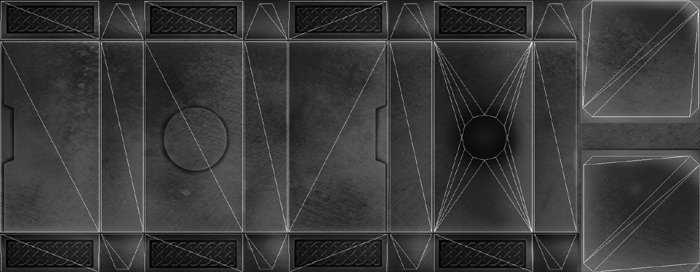
This is the Texture map for the Head of the Hammer. Use this to make small changes to the appearance of the Hammer, like color or decals:
This is the Wireframe layout for the Head of the Hammer. This shows you exactly how the Texture map attaches to the model. You'll need this if you wish to create a completely new Texture map from scratch:
This is the Texture map for the Handle of the Hammer:
This is the Wireframe layout for the Handle:
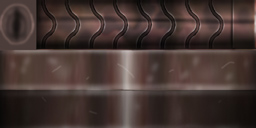
This is the Texture map for the Glowing effect on the Hammer Head. It's a simple, solid color as the Opacity layer contains all of the detail. You could replace this image with Fire or Energy, just be aware that your Texture map and Opacity layer need to line up exactly or you may encounter graphical defects:

This is the Opacity layer for the Glowing effect on the Hammer Head. An Opacity layer is a black and white image, acting like a silhouette. Everything that is black is invisible, and everything that is white is solid. Anything gray becomes transparent and glass-like. The darker the gray, the less you see it. In this example you can see I have a dim gray glow around the electric bolts, which is barely visible on the Hammer. If you change the Texture map for the Glow, make certain your Texture map aligns and is supported by the Opacity layer. Also be aware that this image scrolls across the Hammer Head, so the Top and Bottom must match:
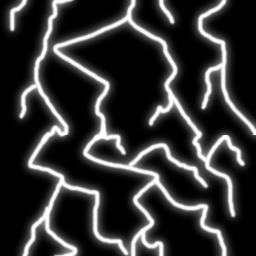
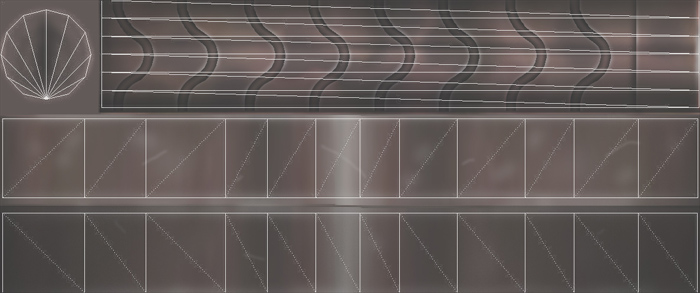
This is the Texture map used for the Lightning Bolts the Hammer fires off. You could replace this with Fire, Ice, Energy, Lasers, or anything that repeats and would look aproperate for an attack. Just make certain that the Right and Left sides match, or an ugly line will race down the beam repeatedly:

This is the Opacity layer for the Lightning Bolts. Keep in mind that this image scrolls, so the Left and Right need to line up, or an ugly line will shoot across your Hammer's Blast attack beam:

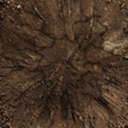
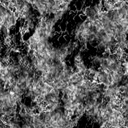
This is the Texture map for the Crater that appears when you do a Hammer Pound. Although the on-screen crater is large, it's only seen for a moment, so it's best to keep this image small, like the example. 128x128 size image should be enough for most people:
There is an Opacity layer for the Crater, but it's solid White, so it's not shown here. You could change the Opacity layer to make an Ice crater, or fire, or lava. Just make sure your Texture map and Opacity layer align, or graphical defects will occur.
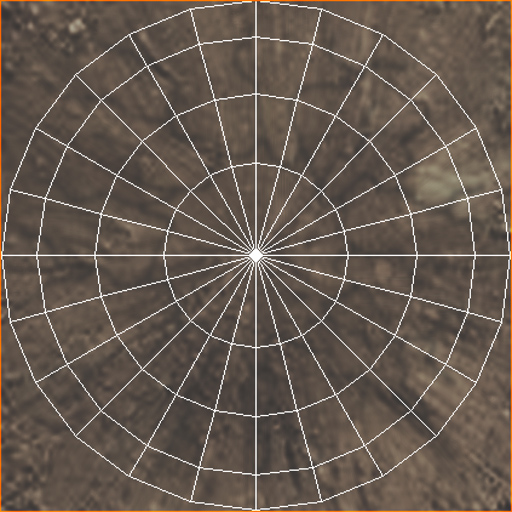
This is the Wireframe for the Crater:
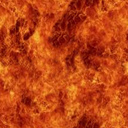
This is the Texture map for the Fireball created by the Hammer Pound. Like the Crater, this object is large on the screen but appears for a very breif amount of time, so I would suggest keeping the image size small, like the example shown here. The image scrolls from side to side, so make certain that the Left and Right edges match, or an ugly line will appear:
This is the Opacity layer for the Fireball:
To add sound, I highly recommend you download and use Audacity. It's a free sound editing tool that can export out OGG sound files. OGG sound files compress down to less then 1/10th the file size of WAV files. SO USE OGG FILES!!! You can download it here:
http://audacity.sourceforge.net/
Please keep your sound volume levels within acceptable limits. DON'T MAKE YOUR SOUND AS LOUD AS POSSIBLE!!! Loud sounds will annoy other users, and reduce your sales. Also avoid using Looping sounds, as IMVU has no controls to stop Looping sounds once they start playing.