DO NOT BUY THIS PRODUCT!!! IT IS FOR DERIVING ONLY!!
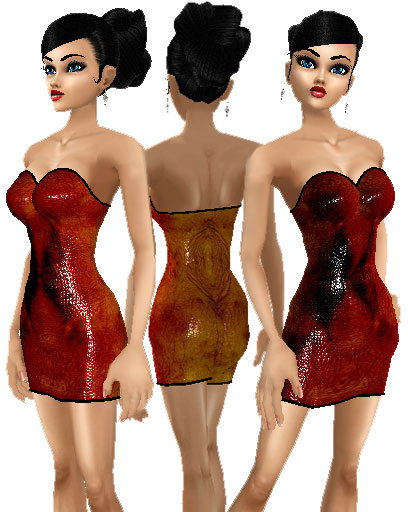
If you buy this, you will just get a plain white minidress, so instead why don't you check out what's been derived from it!!
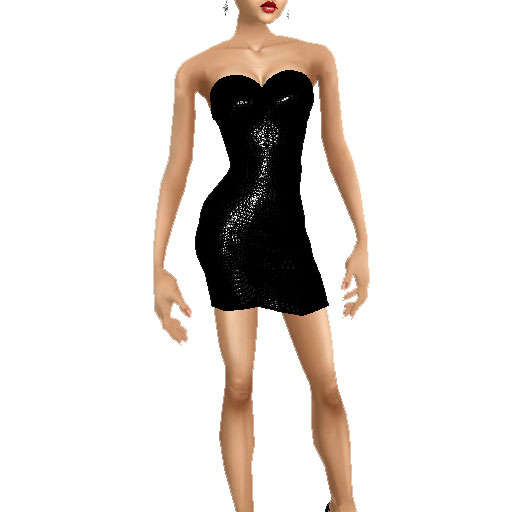
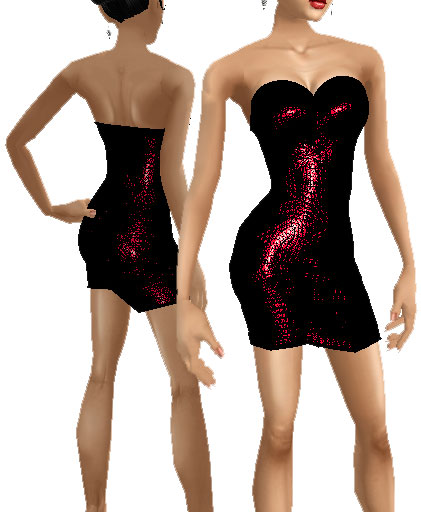
Content Creators: This is the first of what I hope to be a series of derivable SHINY dress meshes - which is to say dress meshes with BUILT-IN SHINE. This mesh gives the effect of material that REALLY REFLECTS THE LIGHT of the room you are in - even coloured lights - and the reflection changes according to viewing angle just like a regular shiny material!! If you have not seen the effect, please check out what's been derived from this product, and my own original Snakeskin Black series.
Since this reflective mesh is unlike most, non-reflective meshes in the catalogue, to get the best from it I would ask you to read the explanation below. It is divided into easy, intermediate and advanced sections. For all derivations, however, please note that because of the built-in shine, this mesh is significantly high in KBs than other, non-shiny meshes weight, and you may like to warn your customers. You are welcome to cut and paste the following into you product page: "Please note that due to the special way this mesh is built, it has higher KBs than non-reflecting meshes (see the size, listed above). If you frequent rooms with limited KBs, please bear this in mind before you buy."
NB: At the time of writing the latest full release of the client is 465 which is buggy, and may mean that some people outside the English-speaking world cannot see this mesh or its derivations correctly. IMVU has corrected this bug with the latest pre-releases, which you can download here, but until they publish the next full release, some users may be affected.
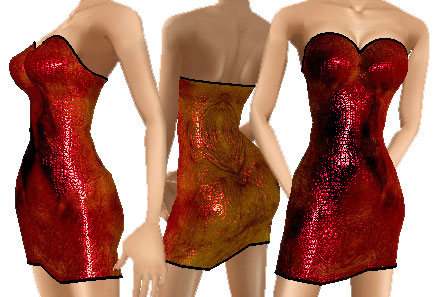
Make a spectacular, shiny minidress simply by doing what you always do! Paint the UV maps below, and apply them to Material 01 in create mode. The shine will be automatically added to your texture!
|
| |
| Just add a simple texture... | ...and get an incredible shiny dress with added sparkle!!! |
|
|
Note that with this mesh you cannot use opacity maps to 'cut away' the material and reveal underlying skin. This is because of the way the shine is built right into the mesh. Opacity maps do indeed have a use in this mesh, and this is explained below.
You have no doubt made clothing items before, and used Opacity to cut away parts of the mesh. It's also likely that you've used the 'Blending' checkbox to create soft borders and translucent fabrics. The following explains how Opacity works with this mesh.
Please take a look at this mesh in Create Mode, and select Material 02. By default, there's no texture there, so please add one (anything, or the texture above) so you can follow this explanation.
Once you have added a texture to Material 02 you should notice the shine shining through it as expected. The reason you can see the shine through the material is because of the Blending Mode setting. When you have made clothes previously you have almost certainly always used the 'Composite' setting in the drop-down box. In this mesh by default the Blending Mode is set to 'Additive'.
What 'Additive' does is to 'add' together the brightnesses of the two layers: your texture and the underlying shine. This means that where the underlying 'shine' material would appear black, the blackness adds nothing you your texture, and your texture appears as-is. However, where the underlying 'shine' material would appear bright white due to the reflection effect, the brightness is 'added' to your texture, making it glisten =)
You can, of course, change the Blending to 'Composite'. The Composite setting will allow you to use an Opacity map in shades of grey. Using a plain mid-grey opacity map will allow 'half' the shine to be seen through your texture, creating a muted effect. Black will allow all of the shine and none of the texture to be seen, and conversely, white will allow none of the shine to be seen through your opaque texture. Please set Blending mode to Composite and add this opacity map:
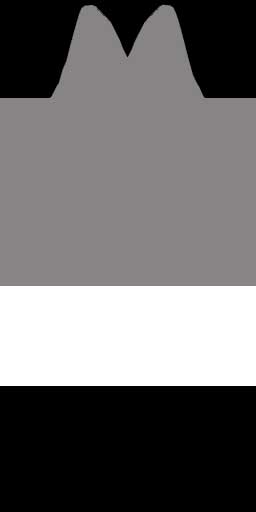
| ...which gives... | 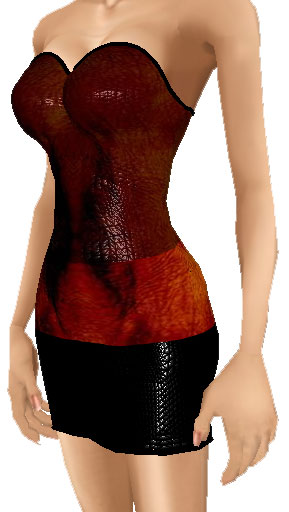 |
You can, of course, change the shine material, which is
Material 00. To see how it works, please put a plain black texture (here's
one you can use:  ) in Material
01 (i.e. the 'dress material' ) and leave the Blending on 'Additive'. This effectively makes the dress
texture invisible so we can concentrate on the shine texture underneath. You
should see this:
) in Material
01 (i.e. the 'dress material' ) and leave the Blending on 'Additive'. This effectively makes the dress
texture invisible so we can concentrate on the shine texture underneath. You
should see this:
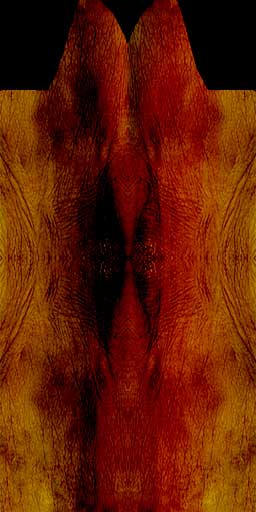
Now replace the shine texture (Material 00) with this one:
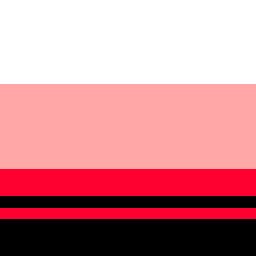 |
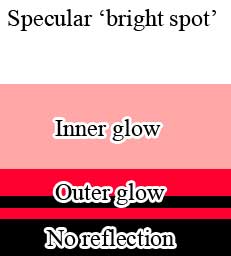
Notice how the brightest part of the shine you see are white, like the top of the shine texture, while the places where there is no shine are black, like the bottom of the texture. Intermediate parts are red and pink, like the middle parts of the shine texture.
That is essentially how it works: the bottom part of the shine texture corresponds to where there is no shine, and the top part is the 'specular' bright spot in the reflection:
 |
If you create new shine materials, please consider the following two points that may be of help:
1) In the real world the bright spot is almost always white. The bright spot of light reflected off a billiard ball is always white - no matter what the colour of the ball. The consequence is that your product will often look best if the upper half of your shine texture (i.e. the specular reflection) remains white. The exception is metallic reflection, which can be coloured (think of a blue bauble on a Christmas tree).
2) Note that in the example texture above, there's a line of black that runs through the red. I have found that having lines like this 'breaks up' the reflection in the mesh and creates greater realism.
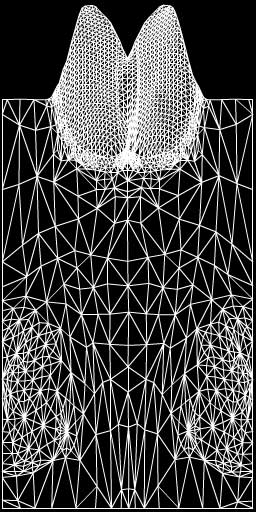
In Create Mode, you'll notice that the default material appears as a 'stick' - that's because it's just one pixel wide and 128 tall! And in fact that's generally all you need - cut your test texture's width down to 1 pixel and you'll see there's no change. In fact, there's no reason to use a wider texture unless you want to take advantage of a final advanced feature of this mesh.
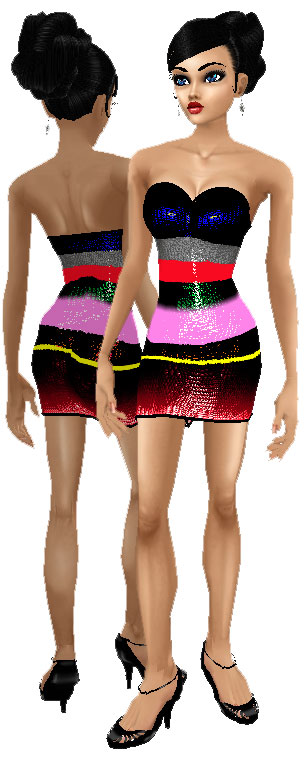
If you use a wide texture, you have some control over what the reflection looks like at different heights on the mesh. So while you don't have control over what the reflection looks like at every spot on the mesh, but you do have some control over what it looks like at different heights. It works like this: the left end of the shine texture corresponds to the bottom of the mesh, and the right end corresponds to the top of the mesh. To be exact, the vertical 'slice' of the shine texture that's used for any give point in the mesh is determind by it's height on othe UV map. Some pictures should clarify - please use this for Material 00:
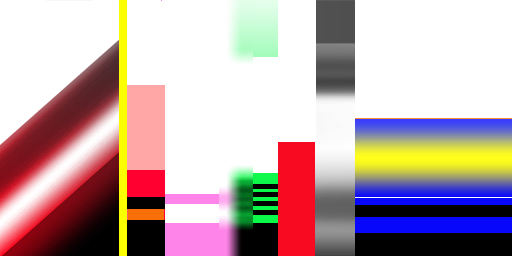 |
..and you will see this effect:
|
Many thanks for considering deriving from this mesh, and I hope it will help you to add some extra sparkle to IMVU!!